How to add a Hood to a Cardigan with FREE Hood Pattern Pieces!
Follow us on facebook HERE
Follow us on instagram HERE
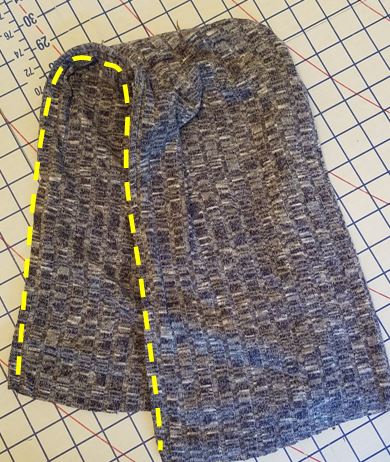
Cardigan pattern here --->SHOP NOW
FREE HOODIE PATTERN PIECES ---> DOWNLOAD HERE
Last week I hope you enjoyed our Claire Cardigan SEW ALONG! You can check out all the posts HERE if you missed it! One customer suggested it would be great if it had a hood, so guess what?? Today I am showing you how to add a hood and giving you the pattern pieces for free! Grab the hood pattern pieces HERE and grab the cardigan HERE.
Use coupon SAVE40 at checkout to get
40% off your entire purchase!
Here's mine! Let's get started!

1. Print your pattern piece. Cut out the size you need.
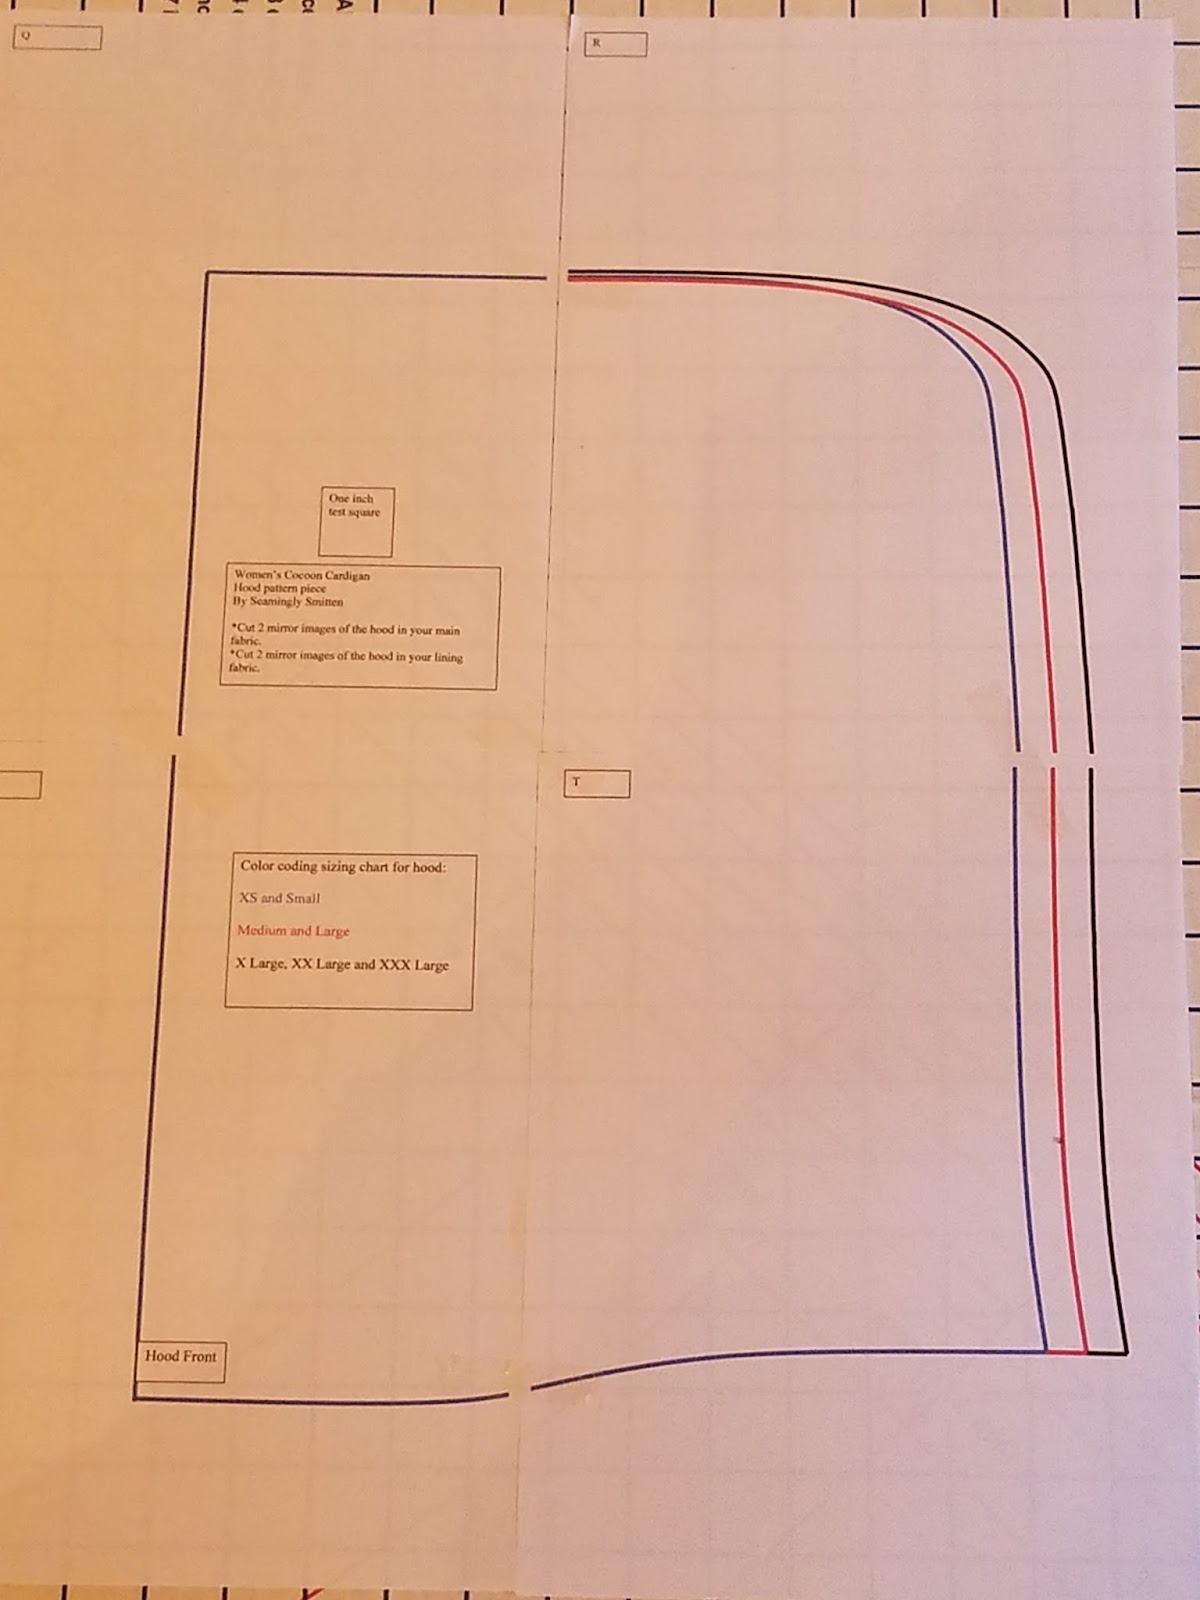
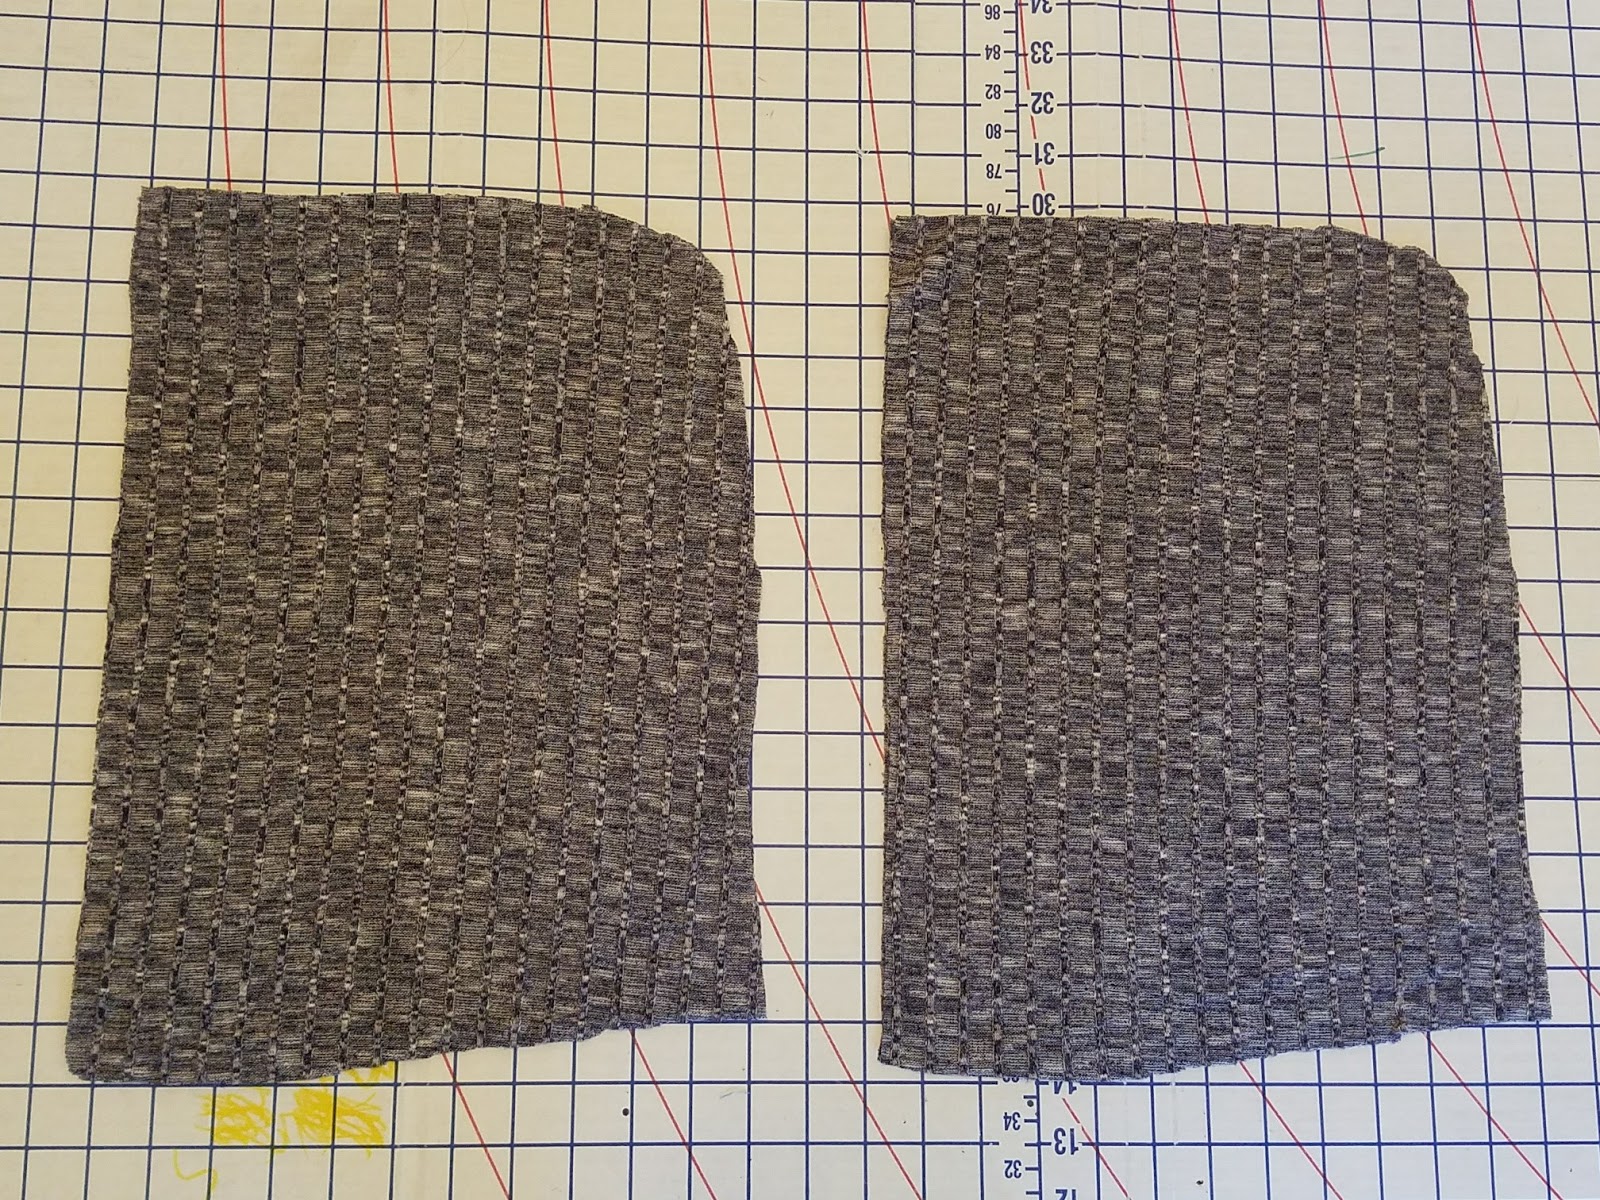
2. Cut out 4 hood pattern pieces:
Cut out 2 hood pieces for your outer hood (one is a mirror image of the other – just flip over the pattern piece). Cut out 2 hood pieces for your hood lining (one is a mirror image of the other – just flip over the pattern piece). You have 4 hood pieces in all.
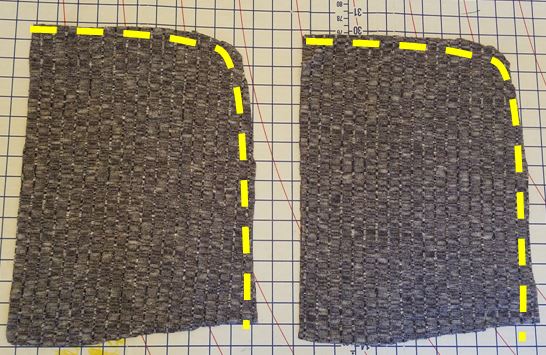
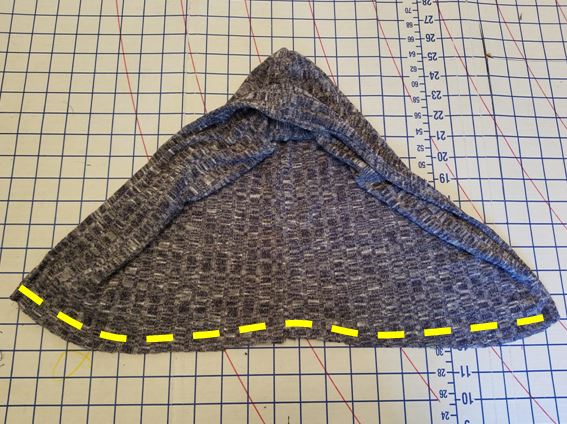
4. Place the hoods right sides together, matching the center seams. Pin along the
hood opening only. Sew around the hood opening using a 3/8 inch seam allowance.
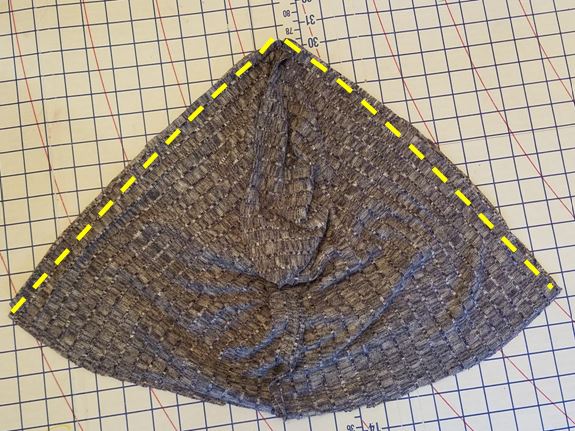
5. Turn hood right side out and push lining into the main hood. Topstitch around the hood opening using a 1/8 inch seam allowance to secure the lining to the main fabric.
6. Using your longest stitch, baste around the bottom edge/neckline of the hood to hold the two fabrics in place using a 1/4 inch seam allowance.
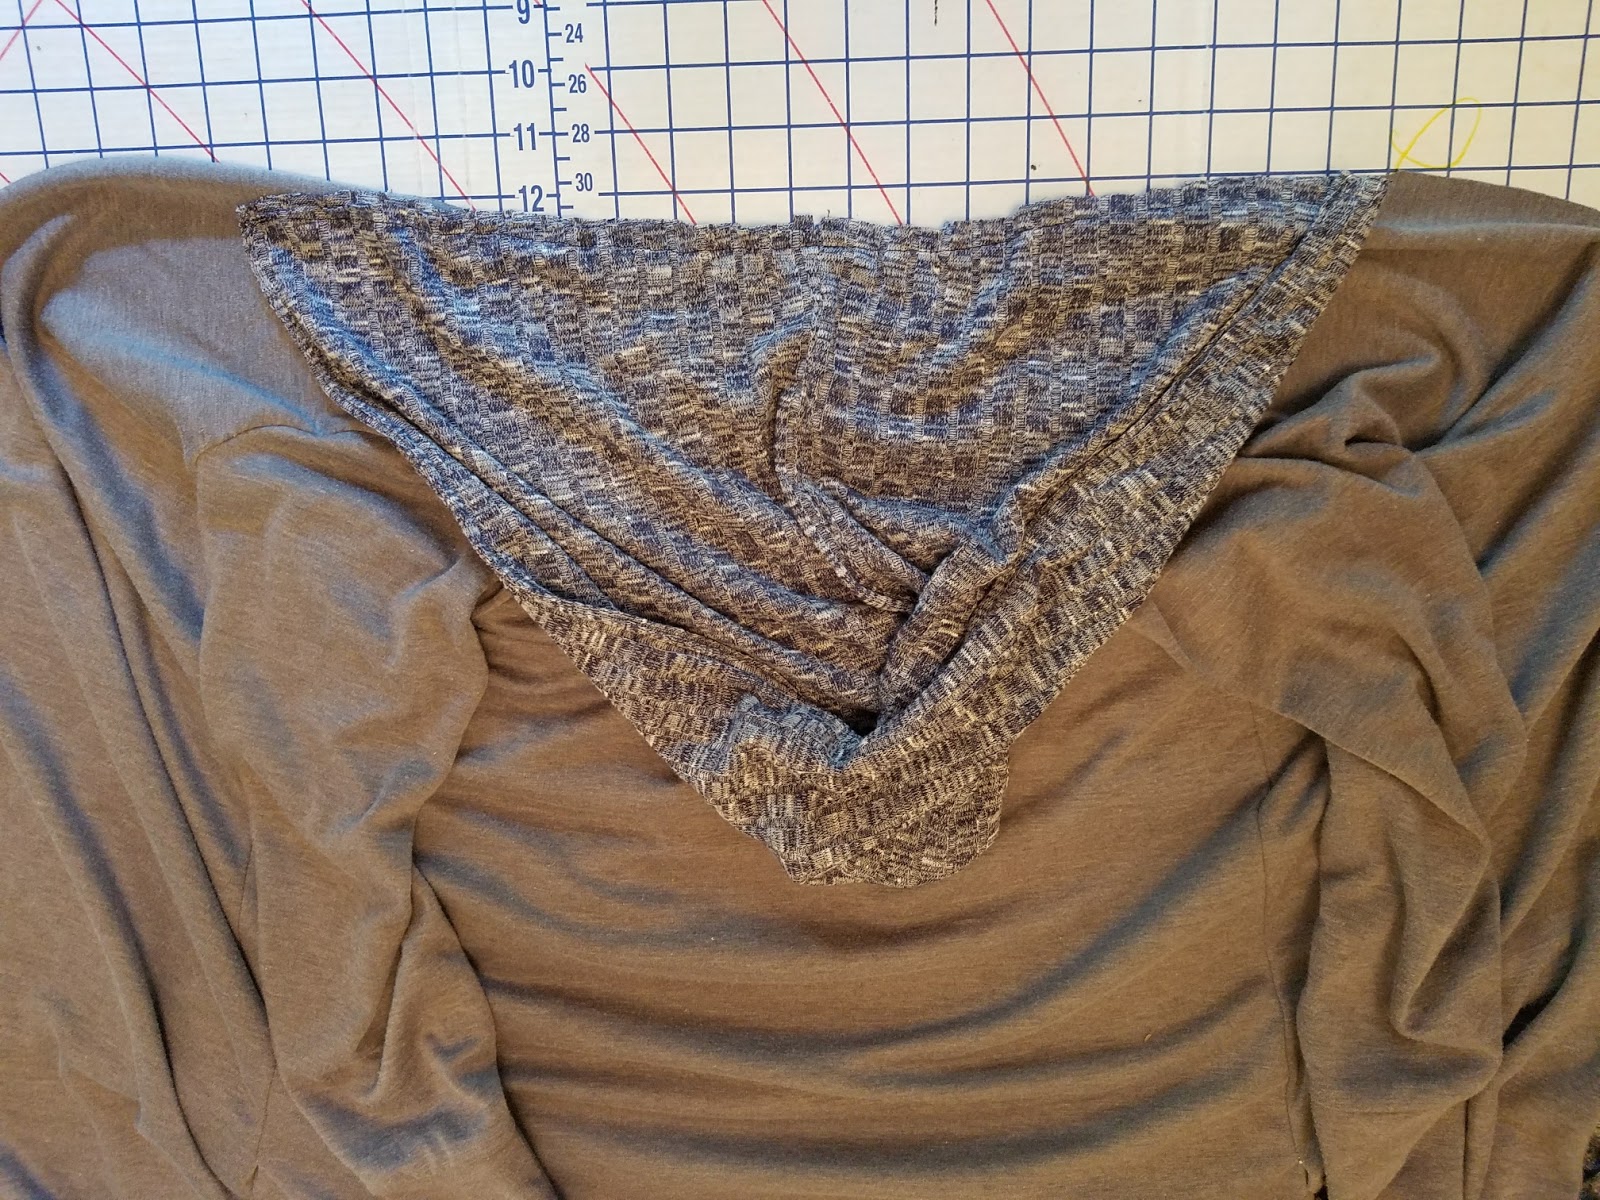
7. Lay your cardigan right side up and lay your hood right side down, centered, matching raw edges of the hood to the neckline. Pin in place.
Sew along the hood using a 3/8 inch seam allowance.
8. Serge or zig-zag stitch seam allowance to reduce bulk. Trim threads.
Press seam to the inside and down.
9. Hem sides and bottom of cardigan as PATTERN instructions say.
Wear it and enjoy it!! Come post a pic on our facebook page or tag us on instagram #seaminglysmitten #clairecardigan
Happy Sewing!!
seaminglysmitten@gmail.com